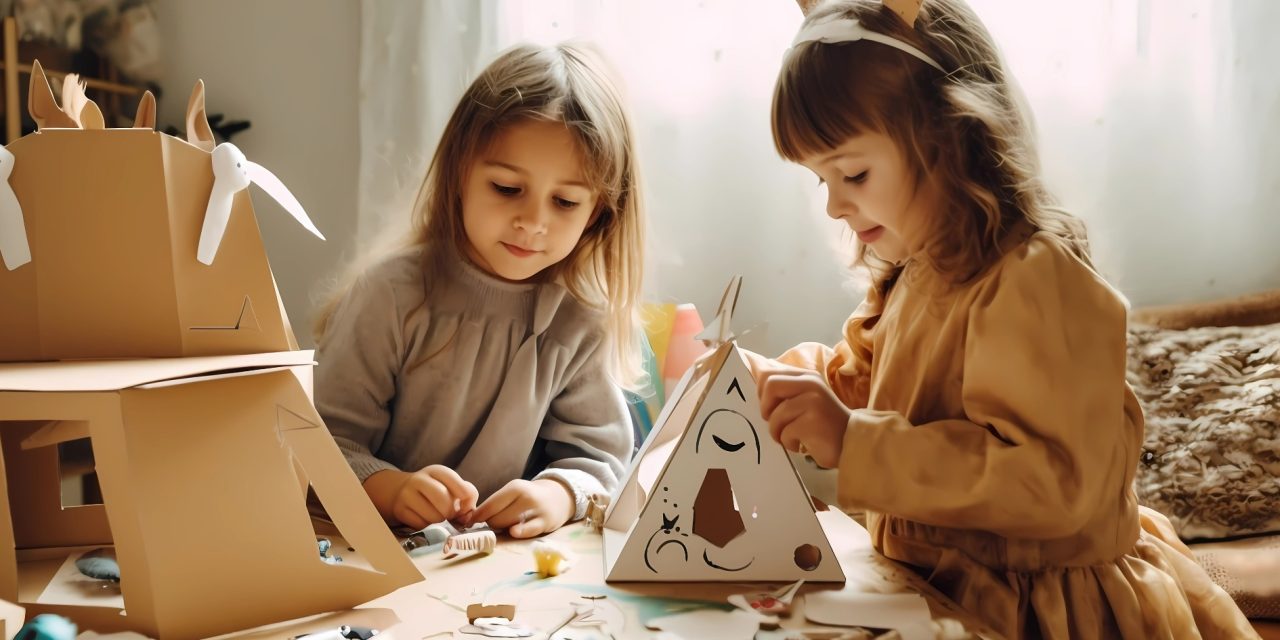
If you’ve ever seen a child turn a cardboard box into a castle or a sock into a superhero, you already know: the best toys are powered by imagination. DIY toy kits tap into that creative spark—and the best part? They’re fun to make, incredibly budget-friendly, and completely customizable to your child’s interests.
Whether you’re a parent, caregiver, or just a fan of imaginative play, crafting your own toy kit isn’t just a weekend project—it’s a hands-on experience that nurtures creativity, problem-solving, and joy.
Here’s how to build your own DIY toy kit step-by-step.
🧺 Step 1: Gather Everyday Materials
Start with what you already have at home. The goal here is to see potential in the ordinary—household items often make the best building blocks for creative play. Think:
- Cardboard boxes (cereal, shipping, or shoeboxes)
- Plastic bottle caps
- Old buttons or fabric scraps
- Empty paper towel rolls
- String, yarn, or ribbon
You’re not just cleaning out your junk drawer—you’re collecting creative tools.
🎨 Step 2: Add Crafting Essentials
To unlock the full potential of your recycled materials, you’ll need a few must-have crafting tools:
- Non-toxic glue or glue sticks
- Washable markers or crayons
- Blunt-tip scissors (kid-safe)
- Water-based paint
- Popsicle sticks, googly eyes, felt sheets
Place everything in a container or shoebox for easy access. You’ve just created your kid-friendly craft studio.
💡 Step 3: Brainstorm Toy Ideas Together
Now comes the fun part—planning. Sit down with your child and ask, “What do you want to make?” Whether it’s a spaceship, animal puppets, or a treasure chest, this step empowers them to lead the creative process.
Prompt their imagination with open-ended ideas like:
- “What would your dream toy look like?”
- “Can we make a puppet that tells jokes?”
- “Want to build a mini zoo from cardboard?”
Write their ideas on paper and gather the materials accordingly. This builds anticipation and gives them a sense of ownership.
🏗️ Step 4: Build and Create
Turn their ideas into reality. Begin construction with a clear, safe workspace and plenty of time for creative exploration. Offer assistance only when needed—this is where motor skills and decision-making get a serious boost.
Encourage experimentation:
- “What happens if we glue this cap on sideways?”
- “Can this box become a car and a bed?”
Mistakes? They’re welcome. This step is about discovery, not perfection.
🎭 Step 5: Encourage Interactive Play
Once the toy is complete, the learning continues through play. Role-play scenarios, storytelling, and pretend games stretch their imaginations even further.
Tip: Help your child give their creation a backstory. “What’s this puppet’s name?” “What kind of adventures does your cardboard robot go on?”
Interactive play fosters language development, empathy, and creativity—plus, it’s just plain fun.
📦 Final Thoughts
A DIY toy kit is more than a collection of supplies—it’s an invitation to create, explore, and dream. With just a few everyday materials, you can help your child build not only toys but confidence, imagination, and memories that last.
So, next time you’re about to toss that cardboard box or fabric scrap, think again—you might just be looking at the start of your child’s next big adventure.
For more creative DIYs, hands-on activities, and playful learning ideas, visit Marvelus Kids—and don’t forget to share what your child dreamed up this week. What did their imagination turn into?


